Skyline Trail Backpacking Guide, Jasper National Park
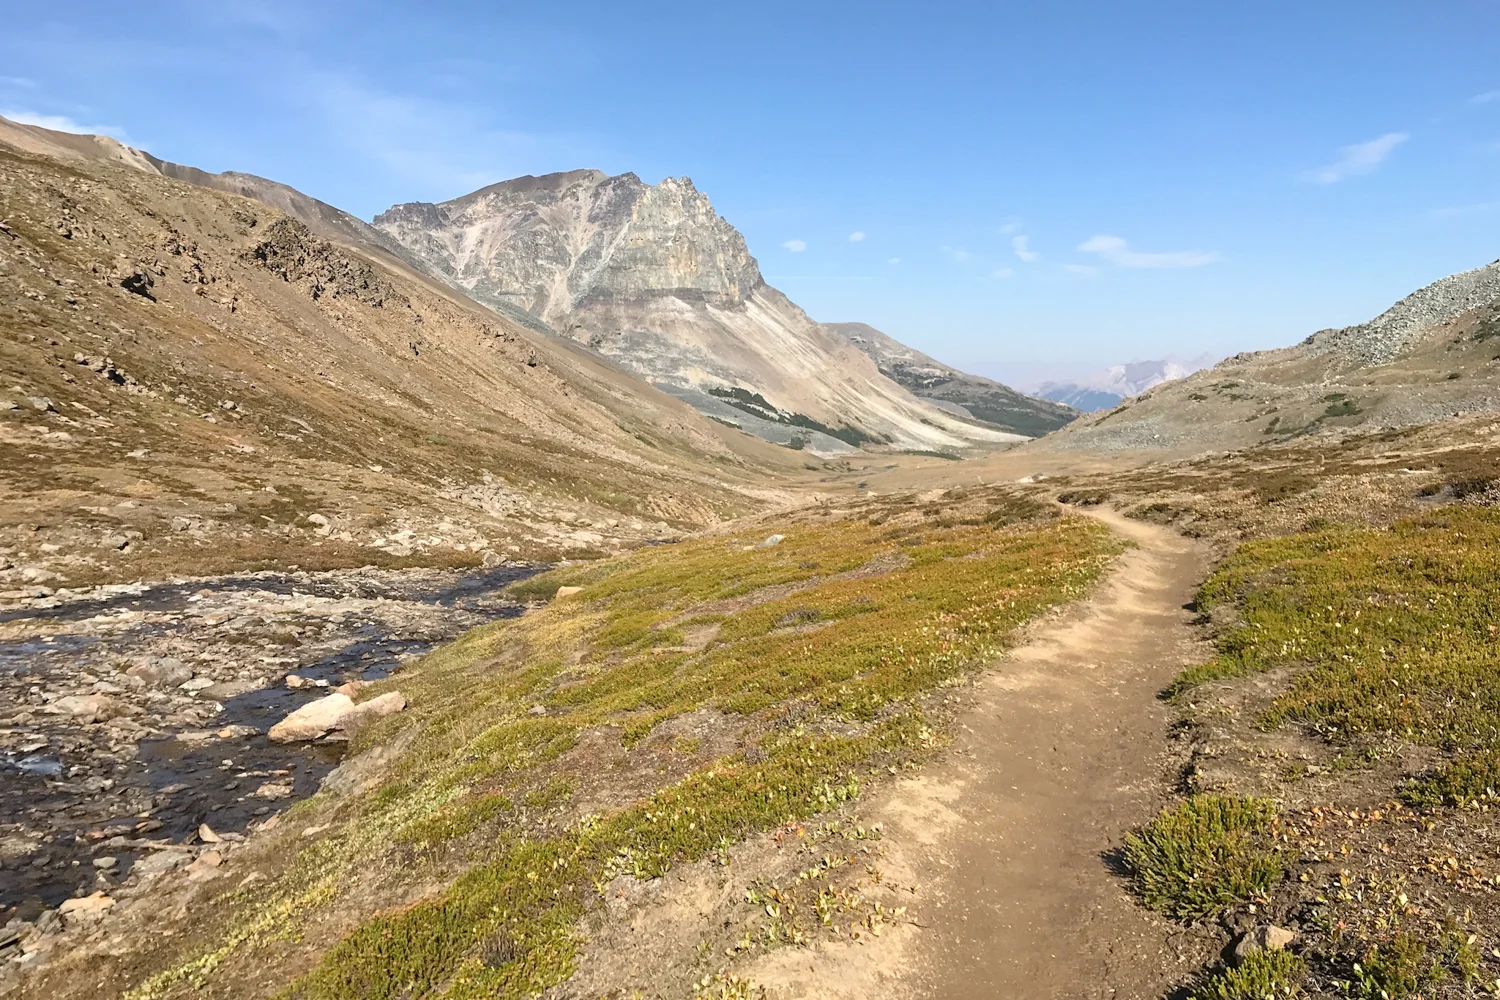
/The Skyline Trail in Jasper National Park is a spectacular backpacking destination in the Canadian Rockies. Of the 44 kilometers of trail, nearly two thirds of the route is above treeline. You can expect sweeping mountain views in all directions, beautiful glacial lakes, and wind-swept ridges for miles. Usually completed in 2-4 days, the trail climbs over three mountain passes along a moderately graded path. You’ll encounter diverse flora and fauna (and a beautiful wildflower display in August), as well as vast meadows great for wildlife viewing. Obtaining a permit for this trail can be tough, but if you’re lucky enough to get one, you’re in for a fantastic high alpine adventure.
Quick Facts
Distance: 44 kilometers (27 miles)
Days Needed: 2-4 days
Elevation Gain/Loss: 1,410 meters (4,625 feet)
Best Travel Time: Late July - September
Permits: Required, more info below
Difficulty: Moderate - Difficult, more info below
Highlights
Good portion of hike above treeline
Sweeping mountain views in all directions
Relatively mellow elevation profile
Well-maintained and well-marked trail
Decent solitude, due to permit process
Great shuttle service options
Lowlights
Highly competitive permit process
Can be very windy along ridges above treeline
9km stretch to/from Signal Trailhead is a forest road walk
Can be susceptible to quickly changing weather
Campfires not permitted
Best Time to Travel
In general, July through September is the best time to hike the Skyline Trail. Snowpack is a key factor for trip planning in this area, as snow can linger on the passes, especially the Notch, until late in the year. Rain and snow can fall at any time of year and freezing temperatures are possible, even in summer months.
As always, be prepared and diligent monitoring current conditions before your trek. Weather can change quickly in this region. Before heading out, check the Jasper National Park trail report for up-to-date conditions at www.pc.gc.ca/jaspertrails.
Difficulty
Total Distance - 44 kilometers (27 miles)
Total Elevation Gain/Loss - 1,410 meters (4,625 feet)
Overall Difficulty - Moderate to Difficult
Skyline Trail Elevation Profile - https://www.pc.gc.ca/
We rate this hike as moderate to difficult. You will have a gradual climb on your first day regardless of your beginning trailhead. After that, most of the trail will undulate up and over three moderate mountain passes on a well-graded trail. Even the descents from the passes, which can be bothersome for many, are fairly gentle. Happy knees!
As always, difficulty ratings depend on your experience, physical fitness, pack weight, & weather conditions. Any hike is likely to be difficult if your pack weighs 50+ pounds and you're in couch sitting shape. This is not a technically demanding hike, but you should plan accordingly, train properly, know your limitations, brush up on your skills, and dial in your gear. Doing so will make for a safe and enjoyable adventure.
Permits
A backcountry permit is mandatory for hiking the Skyline Trail. Permits can be obtained online at reservations.pc.gc.ca or by calling 1-877-737-3783. We recommend booking months in advance (reservations start in January) as this is one of the most popular backpacking trips in Jasper National Park. If you unable to snag your reservation months out, we recommend checking the website regularly as there are sometimes cancellations.
Trailheads & Shuttle Info
The Skyline Trail has two trailheads, Maligne Trailhead (south) and Signal Trailhead (north). We recommend beginning the trail at Maligne Lake and ending at Signal. Most people complete the trail by using the Maligne Adventure’s Shuttle, which allows hikers to park their car at the Signal Trailhead and take a 45 minute bus shuttle to the Maligne Trailhead. As of 2017, the cost was $30 per person and we felt it was well worth it for the convenience.
Getting There
Signal Trailhead: Located 15 minutes from the town of Jasper, head east on Hwy 16 towards Edmonton. Two kilometers from Jasper, you will turn right onto Maligne Lake Road. After 8 km, you will see a small hiker symbol on your right, designating parking for the Signal Trailhead. If you hit Maligne Canyon, you’ve gone too far.
Maligne Trailhead: Located one hour from the town of Jasper, head east on Hwy 16 towards Edmonton. Two kilometers from Jasper, turn right onto Maligne Lake Road. Continue on this road 48 kilometers until you reach Maligne Lake. You’ll pass the chalet and cross the bridge until you reach the parking lot on the west side of the lake. The trailhead is on the right side of the road right before the parking lot.
Campsites
There are six campsites along the Skyline Trail. All campsites have seven individual sites that can be booked, with the exception being Evelyn Creek (which has four). For more information on individual campsites as well as a map and elevation profile for each, visit Jasper National Park’s information page. Below are the distances of each campsite from Maligne Lake.
Evelyn Creek - 4.8km
Little Shovel - 8.3km
Snowbowl - 12.2km
Curator - 21.3km
Tekarra - 30.9km
Signal - 35.6km
Possible Itineraries
Most people complete the Skyline Trail in three days, but faster hikers can complete it in two. Those wishing to have slower days, cover less ground, and explore the alpine area more thoroughly, may choose a four day trip. We enjoy hiking and keep our packs light, so we completed the trail in two days and would hike it that way again. Below are two popular itinerary options.
Two Day Trip
Starting Trailhead: Maligne Lake
Day 1 hike: 21.3 kilometers/13.2 miles to Curator Camp
Day 2 hike: 22.8 kilometers/14.1 miles to Signal Trailhead
Three Day Trip
Starting Trailhead: Maligne Lake
Day 1 hike: 12.2 kilometers/7.5 miles to Snowbowl Camp
Day 2 hike: 18.7 kilometers/11.6 miles to Tekarra Camp
Day 3 hike: 13.2 kilometers/8.2 miles to Signal Trailhead
Maps & Guidebooks
Lonely Planet: Banff, Jasper, and Glacier National Parks - We used this book for planning all our trips in this region and would recommend it. Although it provided a good overview, it did not give all the specifics needed to complete the Skyline Trail.
National Geographic Trails: Jasper South - This map provides in-depth information about the Skyline Trail, including campsites, mileage, and elevation. You will also be able to use this map for other hikes in this area.
Parks Canada Jasper Park Website - We’ve been continually impressed with Parks Canada information on various trails and the Skyline is no exception. Their backcountry guide offers clear and detailed information on completing the Skyline Trail.
Regulations
According to the Parks Canada site, the following regulations are in place for the Skyline Trail. We are not an official source on current regulations, so please consult the official website prior to your trip.
No campfires
No dogs
No bikes allowed between Maligne Lake and Signal Fireroad
Water
Water is plentiful along this trail and easily accessible from small streams. Carry enough water to get from one source to the next and use a lightweight water purifier. Every campsite along this trail has nearby running water. We carried the SteriPEN Ultra and were happy with its performance. Two other good lightweight options are the Sawyer Squeeze and Aquamira Drops.
Backpacking Gear
We prefer lightweight backpacking because it’s more comfortable and it allows us to cover more ground with less effort. For recommendations on our favorite lightweight backpacking equipment, check out the CleverHiker Gear Guide and Top Picks page.
What to Pack
TENT: We used the Nemo Dagger 2P tent on this trip for it's lightweight livability. The Dagger isn't our top pick, but it still makes our list of the best lightweight backpacking tents.
BACKPACK: We used the HMG 2400 Southwest and GG Gorilla backpacks on this trek. Both are lightweight, convenient, comfortable, and make our list of the best lightweight backpacking packs.
SLEEPING BAG: We used the Feathered Friends Egret UL 20 Women’s and REI Magma 10 Men’s sleeping bags on this trek for night time temperatures around freezing. Both sleeping bags are lightweight, incredibly warm, and make our list of the best backpacking sleeping bags.
SLEEPING PAD: We used the Therm-a-Rest NeoAir XLite and Sea to Summit UltraLight Insulated sleeping pads on this trip. Both are light, comfortable, warm, and make our list of the best backpacking sleeping pads.
COOKING SYSTEM: We used the BRS Stove, Snow Peak Mini Solo Cookset, and Snow Peak Folding Spoon on this trek, all of which make our top picks gear list and best lightweight stove list.
WATER PURIFIER: We used the SteriPEN Ultra as our main purification method on this trip. It's lightweight, works fast, and doesn't require any pumping/squeezing or chemicals. Check out our best water purifiers list for our other top recommendations.
SHOES OR BOOTS: We wore Saucony Peregrine 7 trail runners (men's and women's) on this trail and they were excellent. If you prefer boots, make sure they’re lightweight and break them in really well before your trip. Here’s why we prefer hiking in trail running shoes: 5 Reasons to Ditch Your Hiking Boots.
BEAR SPRAY: Jasper National Park is home to a healthy grizzly and black bear population. You should always hike with bear spray and know how to use it properly. We recommend reading Parks Canada's in-depth information on Bears and People as you prepare for your trip.
HEADLAMP: A small headlamp like the Petzl Actik is an affordable, bright, and lightweight option.
FOOD: When backpacking the Skyline Trail you'll have to carry all your food and use the food storage lockers provided at each campsite during the night. For some suggestions on common backpacking food options, check out our backpacking food video.
CLOTHING:
Here are some of our favorite hiking/backpacking clothing items from our Top Gear list.
1 Rain jacket shell - Patagonia M10 / Rab Kinetic Plus
1 Pair rain pants - Mountain Hardwear Stretch Ozonic
1 Down jacket - Patagonia Ultralight Down Hoody
1 Fleece jacket - Extra warmth under your down jacket that will be warmer when damp and better to hike in.
1 Pair hiking pants or running tights
1 Pair hiking shorts - Nike dri fit running shorts
1-2 Hiking t-shirts - Nike dri fit t-shirts
1 Long-sleeve shirt - Nike dri fit quarter zip
1-3 Pair underwear - ExOfficio boxer briefs or or ExOfficio women’s briefs
2-3 Pair socks (add thin sock liners if using boots) - Balega running socks for warm weather & SmartWool mountaineer socks for snow.
1 Pair long john bottoms - long john top optional for nighttime use.
1 Warm hat
1 Sun hat
1 Pair gloves or mittens
MAP & COMPASS: Although the trails here are well-marked, you always want to hike with a good map. For our trip, we hiked with the National Geographic Trails: Jasper South map, which provided detailed information on campsites, trails and milage. In addition, we always hike with a compass, though the trails were easy to follow and we didn’t end up needing it on this trip. We also used the Lonely Planet guidebook to help us plan out our entire trip in the Canadian Rockies and found it very helpful.
FIRST AID KIT: Always bring a small personalized first aid kit. We used the .5 Ultralight Kit and added extras, like painkillers and personal medications.
SUN PROTECTION: Sunglasses (polarized recommended), sunscreen, and spf lip balm are an absolute must.
POCKET KNIFE: We brought along a small Swiss Army Knife, which came in handy here and there.
OTHER ITEMS:
SMALL TOWEL: the Nano pack towel is great.
CASH and ID
PERMITS
PERSONAL TOILETRIES
HAND SANITIZER: Always apply after using a bathroom and before eating.
WET WIPES: These can be useful for cleaning up after hiking.
INSECT REPELLANT: At higher elevations insects weren't a problem for us at all. For lower elevations, a 1oz bottle of DEET will do the trick.
CAMERA: The Sony RX100 is our go-to camera for lightweight backpacking.
Bears & Food Storage
Jasper National Park is home to a healthy grizzly and black bear population. At each campsite there are food storage facilities (bear lockers or hanging cables) for nighttime food storage. Please stow all items with a smell that may attract bears (food, garbage, toiletries, etc.). In addition, each campsite has a designated cooking area with picnic tables to ensure that all food-related activity is away from where you sleep. Please abide by these regulations to limit bear-human interactions.
Bugs
Mosquitoes are present along the Skyline Trail, especially earlier in the season and at lower elevations. Hiking later in the season is often bug-free. Use a combination of permethrin on your clothing and bring a 1oz bottle of DEET for exposed skin to provide full protection.
Skyline Trail Slideshow


More Information
We hope this guide helps you plan a fantastic backpacking trip along the Skyline Trail. As always, please leave a comment below if you have any recommendations, questions, or suggestions. And if you found this guide helpful, click the little like button below to give us a digital high five!
For more popular CleverHiker content, check out the following links:
Disclosure: Some of the links on this page are affiliate links, which means we may receive a small commission if purchases are made through those links. This adds no cost to our readers and helps us keep our site up and running. Our reputation is our most important asset, which is why we only provide completely honest and unbiased recommendations.